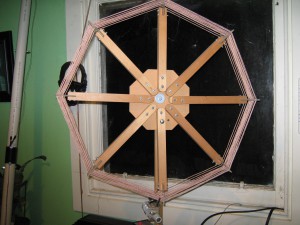
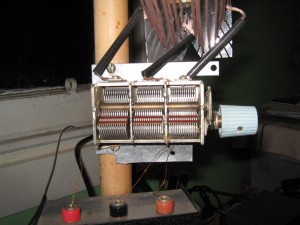
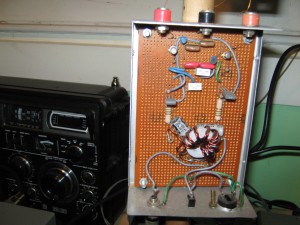
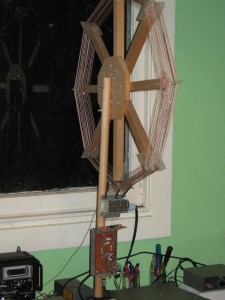
With the very kind permission of Practical Wireless, we are able to reproduce the original article. Please note: copyright still applies.
A Note for WQ Constructors:
You will find some of the parts specified very hard to obtain, the FET transistor can easily be replaced by using 2N5179 or 3N201s.
The toroidal former is available from Coil Specialists in Tauranga as are the chokes (chokes are available from Dick Smith Electronics but have a poor ‘Q’ factor). South Island Component Centre in Christchurch also have these parts.
The Litz wire is like gold to buy and hen’s teeth to find so I would recommend using the strands of enamelled copper wire, I hand-wound every one of the 472 turns – took me 7 hours and I nearly dislocated my eyes doing it! I would suggest making a multi-stranded wire by measuring off 25 strands between two fixed points (I used a garden-tap and a trellis!) then twisting the wire into a cable using a hand-drill, though one of the lower speed cordless jobs would also do the trick. You’ll need some fairly strong material for the spacers, I used Formica (the sort electrical switchboards are made of) whilst Perspex and 3-ply would also do.
And as for the PCB’s, Andy Gardner did have some made up and whilst he no longer has any he may be able to help getting some more etched.
I was in correspondence with the original article author, Graham Maynard, who said that the winding of the toroid was not crucial – not as the perfectionists at PW would like! Just wind sufficient wire to go round the toroid neatly. Graham also said that the wires from the variable capacitor to the FET’s input should not pass through the allocated hole in the PCB but should be soldered directly on to the leg of the FET, which in turn should not be soldered into the board, rather curled up off the board to allow soldering.
The trim-pots should be of a type that they can be readily adjusted from above and have legs that can be bent sufficiently to fit the holes in the PCB.
I didn’t bother with the selectivity resistors (R1, R2, S2) attached to the loop or with the impedance matching stage. I did build one and could find no appreciable gain with it in or out of the circuit though in areas with high local signal-levels (i.e. cities or near transmitters) the attenuation could be handy.
If you can’t get a twin-gang air-spaced variable capacitor that works up to 518pF, then don’t panic, you can switch in extra capacitance in parallel like I do – using a DPST switch and 2 x 150pF ceramic caps. And don’t worry about the Cx trimming as indicated in Fig. 2
You will also need a suitable heat-sink for the BD136’s – they run pretty hot as does R7/R8 – make sure they are CARBON not wire-wound and 1 watt rating.
For those of you who have built the odd PSU in the past, don’t be too worried about using the designer’s somewhat fiddly unit. I have built three as per spec and one other using a standard 7812 reg., suitably adjusted, with a 4700mFd smoothing cap and 1.2 ohm series resistor and it works well also.
I didn’t make any of my four W-Qs tiltable, they simply rotate on a base. I have tried tilting the W-Q by hand to see if there was any advantage and don’t believe it makes much difference.
I hope you have as much fun building the loop and as much success as I have had using it – my best catches would be Reunion 729kHz, Isle of Man 1368kHz, Bahamas 1540 (at 100% word-perfect copy), numerous Argentineans and a few Brazilians – all from home!

